
So, in photos, I present to you:
How to Re-upholster a Chair
1) Buy an old chair. Look for stability of the chair itself. Wobbly chairs are fixable, but if you can find one that's not wobbly, you might save a lot of time. This particular one was covered in a stiff red vinyl, and while the structure of the chair was very sturdy, it had a dimple in the middle of the seat (if you look closely, you can see it. Your butt sinks in when you sit in it- not comfy.). The wood had seen better days, the chair was extremely dirty, but just needed some TLC.
No, the chair isn't actually slanted... I'm just not a good photographer!

2) Turn the chair over and unscrew the seat screws to remove it. If you look, there are seat screws at 12 o'clock and 6 o'clock on this chair. It wasn't hard to take off, but the screws were very old!

3) Remove the current seat upholstery. If you're lucky, you'll only have to pry out a few staples. In my case, there were upholstery tacks holding the vinyl on. Lots of them!
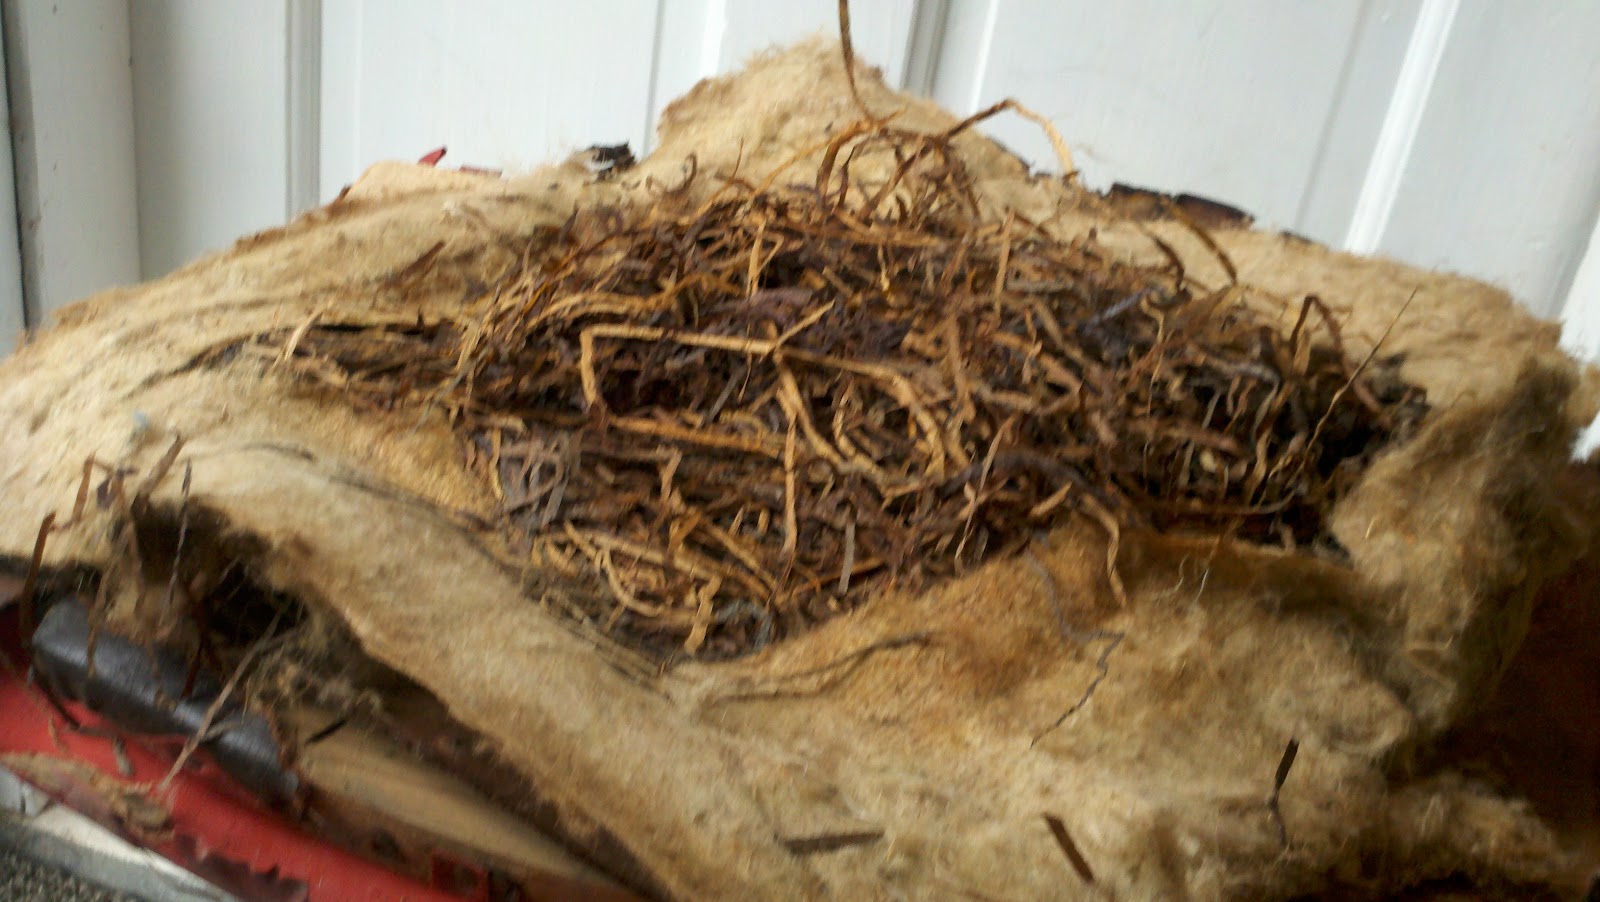
When I took the vinyl off, I found yet another material covering the wooden seat; it appears to have been originally covered in leather. Unfortunately, years of exposure to moisture caused the leather to grow mold... which was a nice little surprise. So, I had to move the party out to the garage (hence the recycling bin in the background) once this was discovered. Look:

That wasn't the only shocker. When I pried the leather off, it was so brittle it just cracked and peeled off like thick cardboard. Then, I found out why the seat had a dimple -- it was filled with what looked like husks and shredded paper. Thousands of sits later, that stuff had no "cush"! Being the safety professional I am, I handled all of this moldy stuff with gloves and a dust mask (my personal protective equipment).
Removing all of this finally revealed the seat! Unfortunately, the front of the seat, where the upholstery tacks had been, cracked all the way through.

4) Fix the chair's structural issues. This could be a project in itself, especially if there are large pieces missing out of the wood, parts of the chair are missing (like a rail) or if it's just extremely unstable.
My issue was the dimple in the seat, since you can see that the picture above shows the burlap covering permanently stretched. I also had to figure out how to repair the edge of the seat.
You can get straps to staple in and stretch across the seat to give it back its spring, but that didn't solve the seat edge issue.
As a fix, I used a jigsaw to cut a piece of wood roughly in the shape of the seat (yes, I used PPE). I nailed it to the original seat. The plywood I used was 1/4" thick, and didn't cause an issue because of the foam I used later. The photo shows how the seat fits onto the chair, but you wouldn't want to attach it just yet.

5) Clean and polish the wood. It's a bummer you can't see the difference in the wood, but after cleaning it up with water, removing decades of dust improved the chair slightly. Next step: Lemon oil. It can help to restore and clean the wood if it's already in decent shape. Apply lemon oil to a soft towel and rub the wood down, being generous with oil.
This chair frame had specks of white paint splatter on it, which, after rubbing down 3+ times with lemon oil, came off easily with a fingernail and did not damage the chair. The wood just sucked this stuff up!! As a bonus, the oil made the chair smell like lemons. :) For any of the rough areas with wood splinters or dirt that wouldn't come off, I sanded very lightly with super-fine sandpaper, then applied extra lemon oil on top. After three applications over the course of 6-10 hours, the chair looked darker, less aged, and much more polished.

6) Apply foam and batting to the seat. Cut 1" foam (green in the photo below) to the shape of the seat, leaving 1" extra past the seat's exact dimensions. I also did a rough bevel of the foam with some sharp scissors, but it's not totally necessary if you're using batting. You can get this foam by the yard anywhere you can buy fabric. While you're there, buy some batting. I used organic bamboo batting, but the synthetic kind will work just fine. I bought some that was thick enough to conceal the bump of the plywood seat I cut out, but you have a lot of flexibility here. Cut the batting and allow at least 5 inches past the seat's edge (10 inches total). You can trim later, but it's harder to fix if you don't allow enough material. Lay that down, the place the foam down with the seat on top. Pull the batting so it's taut and staple approximately every 3-4 inches, about 1 inch from the edge of the seat.. Trim excess material once the batting is secure.


I used an upholstery fabric on my chair, but regular cotton print fabric can work just fine too, depending on how hard you're going to use this piece. I would choose the heavier upholstery fabric for a chair which will endure a lot of wear and tear. For my ottoman, as an example, I used regular thin cotton fabric since no one really sits on it.
Close-up of the seat, complete:

7) Home Stretch: Screw the seat onto the chair frame. Align the screws and re-attach. Make sure the seat is secure.
I had some issues with mine, since the thickness of the material between the frame and seat was too thick for the shallow screws that were originally used. I drilled two holes next to the original ones and used longer screws to make sure the seat would stay in place. The new screw's on the right, old one at left.

Turn the chair over, and tada! Done in 7 steps.
Doing the math:
Chair - $7.54
Foam - $4.44
Batting - $2.29
Fabric - $3.66 (with coupon)
GRAND TOTAL: $17.93
...with plenty of material left over.
Here's the final product.


No comments:
Post a Comment