Showing posts with label Christmas. Show all posts

Saturday, January 28, 2012

Magnetic Scrabble Board Art

There was only one gift-giving rule for our family Christmas this year: everything must be hand-made. Now, that term can be used pretty loosely, but it resulted in some really amazing and most thoughtful gifts I have ever seen. 

Next on the handmade gift list...
Scrabble Board Artwork

Jose Carlos is from Sevilla, Spain. When he first came to the U.S., he came to study English for 16 weeks in Indiana University's English program. Since he and Ben had met during Ben's 2008 trip to visit a friend in Spain, Ben invited him to stay with the rest of the family (i.e. his parents), who were glad to welcome him.

On his very first evening in America, we invited him to play Scrabble with us. How mean are we?? His English was already very good. What's more, you would never be able to pick him out from a crowd - as a European, that is... his friends call him "the American" by the way he dresses and acts. Needless to say, from the time we started playing Scrabble, he fit in with us perfectly. :) 

Jaz and  The rest is history, and their wedding day was October 15th, 2011. (Remember that wreath I made them for their new place?)

For a Christmas gift to them, I decided to make them something that brings happy memories for all of us - the magnetic Scrabble board!


What you need:

  • A piece of sheet metal (you can buy one at Lowe's like I did)
  • One length of decorative molding (again, Lowe's) - I think mine was 8 feet long.
  • Plywood
  • Liquid Nails adhesive
  • Drywall repair spackle
  • Paint
  • 1 Scrabble board game
  • 104 Earth Magnets

How I did it:

1) I used some scrap plywood to make a backing that allowed 2"-3" inches beyond the dimensions of the sheet metal. Then, some Liquid Nails glued the sheet metal to the plywood backing.

2) Next, I measured out the decorative molding to the dimensions that will frame the sheet metal. You know that phrase, measure twice, cut once? Definitely should've followed that rule.
I just used a jigsaw, but your cuts will be much cleaner with a rotary saw.
Alternatively, you can use metal snips to cut the sheet metal to the right size and use a Goodwill picture frame - I didn't use snips, though... they were so heavy-duty they scared me a little.

 A couple of extra scraps.... I may  or may not have cut some of my wood pieces on the completely wrong angle. Me = so very lucky. I had less than 4 inches of molding left after I cleaned up my mistakes and finished cutting the frame!

3) Once the glue dried, I filled in the cracks in the frame with the spackle. You can use wood filler if you need to fill up some huge gaps.

4) Here's the finished frame after a little bit of sanding and smoothing.

5) I brushed off the dust and then painted the frame with regular black acrylic paint in two layers. I used some leftover poly to give it a shine as the top protective layer.

6) The Scrabble set was an interesting story. I got the Scrabble letters from a seller on Craigslist - a guy who was selling it for a dollar! What is it about Craigslist buyers and sellers that is sometimes so skeazy? I was directed to an address, which turned out to be a used car sales "dealership" that had an inventory of a whole 5 cars in a gravel lot. The main office of this dealership was a small 10 foot-by-10 foot glass cube (!!!), unlit, and pretty scary looking. In the end, I got my Scrabble board for a buck and walked away with a good ol' Indiana experience.

7) The magnets were an interesting adventure too. I got my super-strong magnets from a seller on Etsy - bottlecapartsupplies. It was $22 for a set of 200 rare earth magnets, so if you're searching, look for this: 200 1/4 Inch x 1/16 inch Neodymium Disc Rare Earth Magnets. They're so tiny! When I first received them in the mail, I wasn't even sure if there was anything inside the envelope.

Meanwhile, gluing the magnets was a different challenge. I had glued about 20 magnets to the Scrabble tiles with a hot glue gun, and the magnets were so strong that they separated from the tiles after the glue was dry...fail!

I ultimately used the liquid nails again to glue the magnet and tile together. Success! That stuff is good for just about everything!

Mission accomplished...

8) Then, Ben made his rendition of modern-artistic Scrabble board on the metal with a black Sharpie marker. We also decided to stick magnets to two of the letter holders.

9) Last but not least, I nailed a picture hanger onto the back of the frame.

Ta-da!

Toma - the Spanish word equivalent to our "Yess!!!"


What do you think of my project?
Are we huge dorks or what -- is Scrabble this much a part of your life? :)

post signature

Sunday, January 8, 2012

DIY Monogram Art

There was only one gift-giving rule for our family Christmas this year: everything must be hand-made. Now, that term can be used pretty loosely, but it resulted in some really amazing and most thoughtful gifts I have ever seen.


What next on the handmade Christmas list?

Monogram Art

This gift idea was straight off a Pinterest pin, so I can't take credit for all the creativity. It turned out just as I'd hoped! This monogram artwork is personal, interesting, and flexible enough to give to just about anyone.

I made one of these for Jaz and Jose Carlos, since their last name starts with an "M." As a newly married couple (remember the Fall wreath I made them in October?), they're always in need of meaningful artwork for their apartment.

Here's what you'll need:
- Picture frame, shadowbox preferred
- Exacto knife
- Pencil
- Ruler
- Glue stick
- Paper: scrapbook paper, cardstock, and colored paper

See those little cutout triangles that are red? Well, I didn't initially have any colored paper on-hand to use. I eventually found a green envelope from a Christmas card (how appropriate) and borrowed a couple of slices out of it. While gluing, I remembered that green is the color of Jose Carlos' rival soccer team (Real Betis)...  I thought, "Maybe they won't notice.........." and slept on it.

Sports. Rivalries. To me, that means Ohio State vs. M*ch*g*n. Now, put in that context, it was only right that I should change the accent to Sevilla's team color. ['Cause I dare you to find maize and blue in my house. I dare you!] Unable to find any red-colored paper on hand, I finally found a popcorn box in my pantry that was red. So, I ripped my earlier work apart carefully and used a little piece of a popcorn box for their artwork. Yep, popcorn art. Oh, the things we do for sports.

From start to finish? Easy:
1) Draw a letter, in pencil, on white cardstock. I used the letter "M," which I drew with a ruler and by creating some guidelines.
2) Cut out the letter carefully with an Exacto knife.
3) Free-hand (with your pencil again) some shapes for your cutouts. Mine were triangles of varying sizes. Cut those out with your Exacto knife.
4) Cut out pieces of colored paper that are slightly larger than your cutouts, making sure to match shapes so that the colored paper fits only in one cutout.
5) Glue the colored paper to the cardstock, in the cutout windows.
6) Cut a piece of scrapbook paper (for the background) to the size of your picture frame.
7) Glue the finished letter to the scrapbook paper
8) Frame (then rip apart and restart from Step 4 if you screwed up the color)
9) Gift proudly!

In the end, I liked this project and its simplicity so much that I made another "M" for my sister, Megan. Her  background was grey - lighter this time - and a light turquoise for the inlaid color.

What do you think? Have you made any cool or fun paper gifts?


post signature

Saturday, December 17, 2011

The Christmas Home Tour

This year, the family Christmas gift exchange has only one rule: all gifts are homemade. Which means... I have been trolling Pinterest like it is my job. That's what this no-blogging-lately streak has been about. I cannot wait to show you what I've made!!

Post-Thanksgiving week started out at full steam: every year, I'm so busy with work and other projects that Christmas just seems to blow right by. This year, I decided to be smart and put the tree and Christmas lights up the day after Thanksgiving. It was great! At 60 degrees and sunny, I can't ever remember putting up lights wearing a t-shirt and jeans. With only 8 days left until Christmas, it now looks like a holiday explosion in our house!

On the inside, here's my ever-changing mantel:

And the tree?
I'm so torn when it comes to tree decorating. Like the artwork in my house, I want it to mean something. Don't get me wrong - I love the department store-looking trees and I wish I was capable of doing that myself! But, I still like my ornaments to have some kind of sentimental value. As a young couple, Ben and I have been trimming the tree together for three years, which isn't quite enough time to accumulate a ton of "us" ornaments. In the meanwhile, I have a handful of cheap (and unbreakable!) red and silver ornaments that I picked up from Garden Ridge and Michaels. I love the idea of a few large pieces on the tree, so I made a few big paper ornaments with cardstock. It was missing a little white, anyway. Next year I think I'll go with the big balloon + string ornaments a la Katie.

Here are a few of the "highlights" from our family tree, including:

The quick and easy paper ornaments


 A big star, a blingy pear... two things I bought just because I liked 'em.

 A bunny - possibly Todd's albino cousin.

A beautiful glass starfish ornament given to me by my mom, a gift from Hotel Del Coronado when we all visited (Ben's and my family) San Diego last November...

An Ohio State snowman (whoa, lighting!! Sorry.)


A bird, 'cause- well, I really like birds.

 Ben's family loves anything that says "Joy" around this time of the year, because they once hoped that he would find joy in his life. Very cute! The star was another gift from them. :)


 Here's the night shot..


The photos are a little dark - It was night time and I was excited about taking photos! Moving over to the empty wall next to the door, I threw a handful of pinecones and ornaments in a vase. I used an old silver reindeer next to it. The vase was already there (score - $15 at West Elm in Chicago) and I cut down some tree branches from outside for the vase. I couldn't resist hanging a few ornaments on!


I used a ton of things I had laying around for the mantel. The mantel has always been a challenge because it's extremely shallow - only 6 inches deep. I have mixed feelings about the assymmetry of this setup. The garland was initially hung there only temporarily. What do you think?


I would love to bring fresh greenery in, but I'm a) not lucky enough to have a good evergreen in my yard and b) Ben has allergies so I try to keep things synthetic around here. The mirror (it's huge, $25 from Kirkland's), the candelabra, and topiary were already on the mantel earlier in the year. I threw the topiary in a white Ikea vase and tied a red ribbon around it.


I found the wreath at Michael's a few years ago and have not been able to find one like it since. If you know where I can get a good one, please let me know! The reindeer is an old item from Kohl's at least 2 years ago (he's slightly embarrassed about the butt shot). Are you seeing the JOY theme? Stocking holders were from Target last year, and the stockings themselves were cheapies from Garden Ridge. I made the tags on them. 

The chalkboard was completely an experiment! It's a piece of shelf that I cut to size for an office project, and was just a scrap I had laying in the garage. I painted it with spray chalkboard paint (my first chalkboard paint adventure ever) and after 24 hours of drying, I started drawing and writing on it. Maybe I'll turn it into a XX days 'til Christmas countdown??

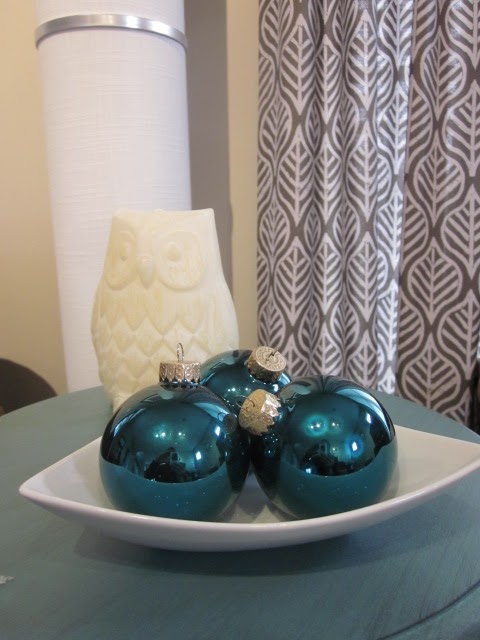
I really like the idea of turquoise, so in the front room, which is a little less traditional, I put a handful of turquoise ornaments in - yet another - vase. I have a handful more turquoise ornaments displayed around the room.


On a completely unrelated topic, I just got this knotted felt pillow from West Elm and l.o.v.e. love it!! There's new artwork up, which I'll show you soon.

 Here's the view from the kitchen to the stairs. Figuring that the kitchen needed something festive, I put up a pre-made arrangement on the door with another red bow.

The garland is zip-tied to the stairs, haha :)


Oh- and can't forget, here's the quick outside shot:


How's your Christmas decorating coming along?
post signature

Monday, December 27, 2010

Holidays. Simple.


This post is dedicated to some festive decorations that didn't break the bank.  Versatile decor pieces are great because they can be used for so many different purposes and occasions (Read: they don't get put in storage for the entire year until December).
My December resolution: Any big decorations I bought this season had to be usable for the rest of the year. I  tried hard to look for Winter - vs. Christmas - decor that wouldn't be awkward to be seeing in the house at the end of January.
Check it out...

1. Table Centerpiece
This one was easy, as you can see. I love the fresh greenery & pinecones in this display, which came directly from our yard. The cake stand (on super-clearance and easily re-used for other decorations!), bells, and ribbon were all Hobby Lobby finds. This took all of 5 minutes to put together.
Total cost for this project: $12
Recycled glass cake stand-  $8
Bells - $3
Ribbon - $1

2. Mantel Display
I was lucky enough to repurpose some of the items from my Christmas last year. The only item I bought is the stocking holders, which were an amazing deal -- $15 for the set at Target.
Because everything else was pretty plain to begin with, I added some more color in the form of stocking holders, stockings, and red chalices. Excuse my artwork - the poinsettias at the base of the fireplace didn't make it into the picture today, but they balanced out the asymmetry of the stockings. 

That mirror and wreath were not intended for holiday decorating; Ben was the one who pointed out it'd look perfect on our mantel (and hide those ugly outlets)! The vases on the right were just filled with red and white mints.  Again, I used pinecones and ornaments for some color on the coffee table. All of the arrows below point out the items in this display that can be used year-round, even though they are outfitted in a Christmas-y fashion here:
 
Of course, there will be more added to this display next year, but we're off to a good start!

Total: $15
Stocking holders - $15 at Target

Everything else I had laying around:
Mirror - $25
Triangle serving tray - $0, wedding gift
Candlestick - ~$15 at TJ Maxx
Vases - ~$4 each at Ikea
Wine bottle - $0.... let's just say we know some winos
Berry Wreath - ~$10 at Michaels

3. Ornaments
Alright, this one's for all of you who have a tree and don't have enough ornaments to put on it! (There's a reason I never took a photo of our bare tree!  It's currently outfitted in a generic-but-tasteful red, white, and silver theme)  Since we're still newlyweds, we have plenty of years ahead filled with kids' homemade ornaments and decorations on our tree that have some personal meaning to us. In the past few years we've received some beautiful and thoughtful ornaments as gifts which we proudly display on our -- but, we have a long way to go.  Take a look at these:


I didn't actually do this, but this idea - pictured above - from DesignSponge is genius: it's contemporary, it's inexpensive, and looks great. These paper ornaments would also make great home-made gifts!! I love the thought that you could easily change the color scheme of your decorations from year to year with a simple project like this. Nice, huh?


So there you have it - happy decorating!

LinkWithin

Related Posts Plugin for WordPress, Blogger...