Showing posts with label mantel. Show all posts

Monday, July 2, 2012

How To: Easy Faux Zinc Letters


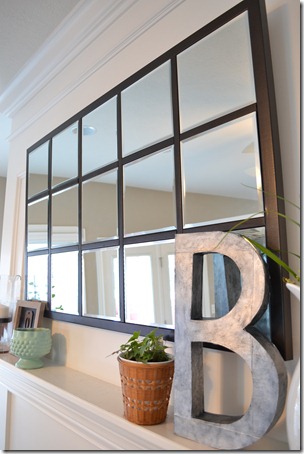
Hey guys! I’m really excited to show you my latest how-to today, the easy faux zinc letter (emphasis on EASY!). Remember the letter “B” on my mantel in the Pottery Barn mirror knock-off tutorial?
Easy Faux Zinc Letter

mirror   
Well, I made that letter “B” out of stuff I had laying around the house. Recycling, actually.
It’s cereal boxes!
I was super lazy efficient about making this, no glue or paper mache required. Yes, you can find cardboard letters like this at Jo-Ann’s. Their design of the letter B looked too much like a number 8 to me so I decided to create my own.

I got so involved in this quickie project that I forgot to take progress photos – oops! This took me only an hour from start to finish. It’s the perfect TV-watching craft.

First, I sketched out two “B”s on the back of some cereal boxes. I used two cereal boxes for this, making sure that the unprinted side of the cardboard was facing out on every side. To make it three-dimensional, I cut the remaining cardboard into 2” strips.

Now. If you’re following along at home, get out your painter’s tape. It was a little pain-staking, but I taped up the letter so that the tape on the front of the letter is invisible (tape inside). The tape’s on the inside of the letter. On the back, I could afford to be less careful and taped this mama-jama up!

Since the letter wanted to roll onto its side, I put a couple of rocks inside to weigh it down. I skipped the full-out papier mache, but if you want, just mix cornstarch & water together and slap some newspaper on that puppy!
DSC_0453 
Go to the store and get yourself some acrylic paint.

Make sure you absolutely absolutely get:
1) Plain black acrylic paint
2) Folk Art “Pearl White” – You’ll find it with the rest of the metallic acrylic paints. It’s a white metallic.
Take the black paint and cover everything. Let it dry.
DSC_0455 DSC_0456

Hooray! Here comes the MAGICAL part. I was like a kid in a candy store when I saw how cool this effect was… who knew that a layer of white metallic + black = metal look??  #WorthTheHype

Take a dry brush, and load sparingly – at first – with the Pearl White paint. Brush it on using straight strokes and dab it on to get the look you want.
DSC_0458
Fun, huh?
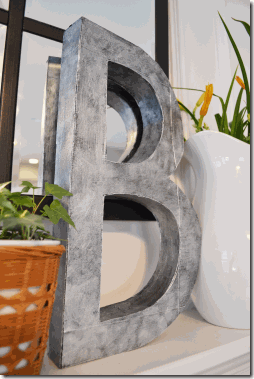
Check out this close-up of the letters. I love how the edges look forged when they pick up the shine from the metallic paint!
BCloseUp

So there you have it – a metal letter art for the cost of 2 bottles of acrylic paint and an hour of your time. Happy painting!
Easy Faux Zinc Letter

I linked up at:
   Liz Marie BlogHome Stories A2Z

Thursday, June 7, 2012

How To: The Pottery Barn Knock-Off Mirror

Can you justify paying $699 for the Eagan mirror from Pottery Barn? Actually, I did the math. With shipping oversize item fees, tax, and plain old shipping, we’re looking at:

Retail price - $699
Tax, 7.5 % - $52.43
Shipping (10%) - $69.90
Oversize item fee - $60
TOTAL COST: $882.33


Holy Mastercard, Batman!!!


I saw some tutorials on my favorite blogs on how to make one of my own, so I did! I mostly followed this one, at The Lettered Cottage (the rest of their house is amazing, too). I made mine a little more polished by adding a thicker frame to my mirror. Here’s the finished product:

House Stuff Works: DIY Pottery Barn Knockoff Mirror

I walked into the project with ZERO knowledge of what to do, what to buy, or how to do it. Through a google search, I found several other tutorials which were helpful, here and here.
The goods:
  • 15 8x8 mirrors (located in the candle section – they’re considered candle holders, and they regularly go on sale for 50% off. Mine were $2.49 each, on sale.)
DSC_0371 
  • Wood
    • (2) 2"’x4’ pieces of particle board (the mirror will measure 44.5 x 27 inches – I used 1/2 thick plywood to cut weight) 
    • 4 brackets to hold two pieces of particle board together (near the hooks at Lowe’s. I used 1”x4” boards for support and nixed brackets altogether)
    • (3) 8 ft. sections of 3/4 inch flat molding (to go in between the mirrors)
    • (2) 8 ft. sections of 1 1/16 inch corner molding (kinda pricey at $10/piece. Other bloggers have said each one only cost them $4, so I must be missing something)
Wood Supplies
  • 1 can Oil-Rubbed Bronze Spray Paint  (you could probably get by with one. Or, use stain for a more natural look)
 DSC_0377
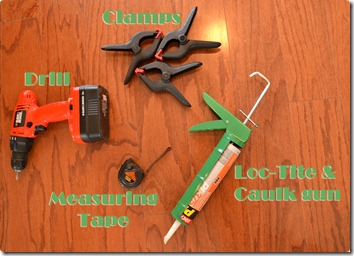
  • Loc-Tite, Liquid Nails, or heavy-duty adhesive (I used construction grade Loc-Tite, available in the adhesive aisle at Lowe’s)
The tools:
  • Caulk gun
  • Miter saw
  • Jig saw or circular saw
  • Tape measure
  • Clamps
  • Personal Protective Eqiupment! (Loss of eyes and hearing is permanent!)
DSC_0378  DSC_0373

DSC_0376

tools
If you’re going to make this mirror yourself, make sure to research the other blogs I mentioned and get detailed instructions. In a nutshell, you’re going to:

1. Cut the plywood, corner molding, and flat molding to size.
Allow for 8 inches, even though most of your mirrors may not actually measure exactly 8 inches square. You won’t notice it – I promise.

Also, I cut weight by using 1/4 inch plywood. I was worried about warping, so I backed it with a few pieces of 1x4 inch scrap wood, which also doubled as a bracket. You’ll see the 1x4s in the photos below.
The tutorial at The Lettered Cottage gives dimensions, but if you’re more of a visual person and using a thicker frame like I made, then see below.

I really wish I had seen a sketch like this in other instructions… slow ol’ me took a while to engineer this out!
drawing
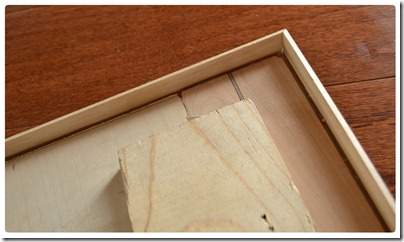
HYere are a few close-ups of how the frame fits in real life. The corner molding will be glued to the top of the mirror backing.
bottomview

bottomview2
Make sure you cut everything the right size before you start gluing…

2. Attach brackets and plywood together to create the proper sized backing for the mirrors.
I used extra 1” x 4” boards instead of brackets, with screws. Don’t worry about the screws sticking out. Here is the back view:
back2
And front view:

front

3. Place the mirrors and molding on the plywood all at once.
This is the moment when you find out if you’ve measured and cut everything correctly!
I used post-it notes to label my mirrors and make sure they went back in the same place (and in the same direction) once I’d decided to put them in a particular spot. I had to do this because I cut the plywood to accommodate the 7 7/8” mirrors, only to find that some were larger and some were smaller, and some were cut completely crookedly. Account for 8 inches and you won’t find yourself in the same awful Tetris-playing mess. placing1

 4. Glue down the wood only.
Glue one edge of the frame at a time, then make sure everything lines up again. This was a super-slow process since I only have three clamps!
I was lucky enough that my corners matched up, but if they don’t, consider using wood filler to eliminate any gaps between the molding.
DSC_0356 If you decide to add the little rosettes (available in the picture-hanging section of the hardware store), glue those down too. I went without.

5. Paint!
…Or stain. I am kind of kicking myself for not staining it. I would’ve liked a dark walnut color, but the oil-rubbed bronze is still really nice. Don’t attach the mirrors until after you paint.

6. Glue the mirrors.
My mirrors had little foam feet on them, so I just put glue on the foam feet and put that down on the plywood. This takes at least a full day to dry. If you need to reposition the mirrors at all, try using a suction cup so you can pick it up safely and easily.
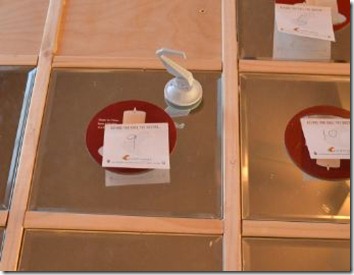
suction

7. Attach hanging hooks to mirror (and wall).
I don’t have any pictures of this, but I used Hillman 50-pound picture hanging wire and screw-in hooks. If I had to do it again, I’d probably use D-rings. At this point, the mirror is super heavy!
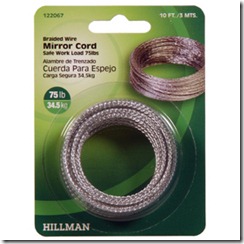
hillman
You’d be crazy not to screw this mirror directly into the studs, and that was my challenge – the studs above the fireplace are NOT anywhere centered, so the mirror actually hung really crookedly for a while. Watch out for that.

6. Clean mirrors
I accidentally discovered that painter’s tape is stickier than the adhesive on the mirror stickers. So, I stuck painter’s tape to the stickers and pulled the painter’s tape off, saving me tons of time from scratching and peeling stickers off of mirrors. (Sorry for the dark picture, those windows get crazy bright!)
DSC_0425
To clean the adhesive gunk off of the mirrors, rubbing alcohol and a paper towel works wonders – skip the 409 and Goo-gone.

Other things I wish I knew:
Don’t use a miter box. It is a pain.in.the.behind. Get a miter saw, like the one I borrowed from my friend Emily (Thanks, Em!)

Measure twice, and then measure again. I screwed up the direction of one of my diagonal cuts (arrrgghh!) and had to buy another piece of corner molding, at $10 per section. Expensive mistake!

Don’t sweat it if there are gaps between the mirrors. The mirrors I bought were all 7 7/8” and as much as 3/16” inch smaller than 8 inches. A few were cut unevenly. You’d only notice if you were using them for this project! Don’t trim your plywood or molding – just let it be and hide the spaces when you put them all in place. The dark color of the stain/spray paint should hide the gaps too. I spent at least a few hours making the mistake of cutting them short, and some of my mirrors didn’t fit in the frame well. I know I’ve said this twice now, but it was SO frustrating!

It’s ok if the mirror no longer fits in its little molding “frame.” You can still save it - when you put the mirror into place, make sure it’s flat (and not at an angle) when you glue it down.

Total cost: < $100 (including my expensive cutting mistake, something like $85). Now, if I could convince Ben that I just saved almost $800…!

Ta-da!
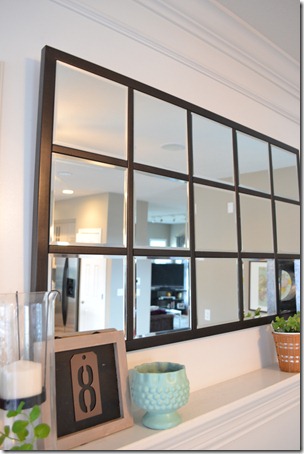
House Stuff Works: DIY Pottery Barn Knockoff Mirror

House Stuff Works: DIY Pottery Barn Knockoff Mirror

DSC_0490

Thanks for stopping by!
Linked at:
IhookedupwithHoHlamespiceTDC Before and After Liz Marie BlogToo Much Time On My Hands

Monday, June 4, 2012

New Mirror Reveal!


After about two weeks, multiple trips to Hobby Lobby, and lots of sawing, my new mirror is finally mounted above the mantel!

I posted more details and the tutorial here.

DSC_0476
It’s my own knockoff version of the Pottery Barn Eagan Mirror, which retails at $699. Here’s the real thing from the PB catalog:
eaganmirror

More details on this project later… it requires a lot of explanation. Meanwhile, do you recognize any of the other items I put on the mantel?

Saturday, December 17, 2011

The Christmas Home Tour

This year, the family Christmas gift exchange has only one rule: all gifts are homemade. Which means... I have been trolling Pinterest like it is my job. That's what this no-blogging-lately streak has been about. I cannot wait to show you what I've made!!

Post-Thanksgiving week started out at full steam: every year, I'm so busy with work and other projects that Christmas just seems to blow right by. This year, I decided to be smart and put the tree and Christmas lights up the day after Thanksgiving. It was great! At 60 degrees and sunny, I can't ever remember putting up lights wearing a t-shirt and jeans. With only 8 days left until Christmas, it now looks like a holiday explosion in our house!

On the inside, here's my ever-changing mantel:

And the tree?
I'm so torn when it comes to tree decorating. Like the artwork in my house, I want it to mean something. Don't get me wrong - I love the department store-looking trees and I wish I was capable of doing that myself! But, I still like my ornaments to have some kind of sentimental value. As a young couple, Ben and I have been trimming the tree together for three years, which isn't quite enough time to accumulate a ton of "us" ornaments. In the meanwhile, I have a handful of cheap (and unbreakable!) red and silver ornaments that I picked up from Garden Ridge and Michaels. I love the idea of a few large pieces on the tree, so I made a few big paper ornaments with cardstock. It was missing a little white, anyway. Next year I think I'll go with the big balloon + string ornaments a la Katie.

Here are a few of the "highlights" from our family tree, including:

The quick and easy paper ornaments


 A big star, a blingy pear... two things I bought just because I liked 'em.

 A bunny - possibly Todd's albino cousin.

A beautiful glass starfish ornament given to me by my mom, a gift from Hotel Del Coronado when we all visited (Ben's and my family) San Diego last November...

An Ohio State snowman (whoa, lighting!! Sorry.)


A bird, 'cause- well, I really like birds.

 Ben's family loves anything that says "Joy" around this time of the year, because they once hoped that he would find joy in his life. Very cute! The star was another gift from them. :)


 Here's the night shot..


The photos are a little dark - It was night time and I was excited about taking photos! Moving over to the empty wall next to the door, I threw a handful of pinecones and ornaments in a vase. I used an old silver reindeer next to it. The vase was already there (score - $15 at West Elm in Chicago) and I cut down some tree branches from outside for the vase. I couldn't resist hanging a few ornaments on!


I used a ton of things I had laying around for the mantel. The mantel has always been a challenge because it's extremely shallow - only 6 inches deep. I have mixed feelings about the assymmetry of this setup. The garland was initially hung there only temporarily. What do you think?


I would love to bring fresh greenery in, but I'm a) not lucky enough to have a good evergreen in my yard and b) Ben has allergies so I try to keep things synthetic around here. The mirror (it's huge, $25 from Kirkland's), the candelabra, and topiary were already on the mantel earlier in the year. I threw the topiary in a white Ikea vase and tied a red ribbon around it.


I found the wreath at Michael's a few years ago and have not been able to find one like it since. If you know where I can get a good one, please let me know! The reindeer is an old item from Kohl's at least 2 years ago (he's slightly embarrassed about the butt shot). Are you seeing the JOY theme? Stocking holders were from Target last year, and the stockings themselves were cheapies from Garden Ridge. I made the tags on them. 

The chalkboard was completely an experiment! It's a piece of shelf that I cut to size for an office project, and was just a scrap I had laying in the garage. I painted it with spray chalkboard paint (my first chalkboard paint adventure ever) and after 24 hours of drying, I started drawing and writing on it. Maybe I'll turn it into a XX days 'til Christmas countdown??

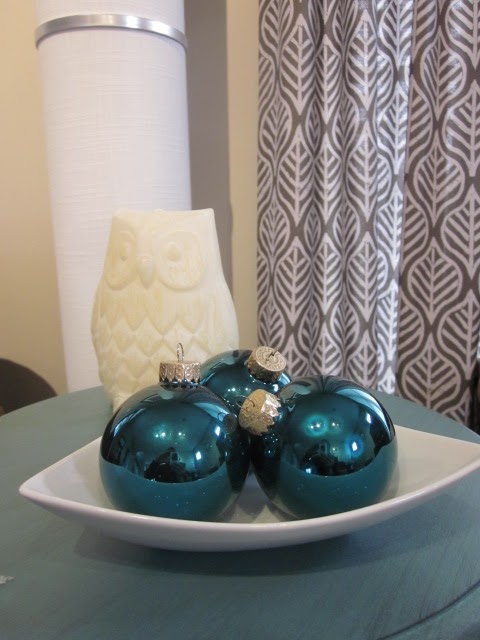
I really like the idea of turquoise, so in the front room, which is a little less traditional, I put a handful of turquoise ornaments in - yet another - vase. I have a handful more turquoise ornaments displayed around the room.


On a completely unrelated topic, I just got this knotted felt pillow from West Elm and l.o.v.e. love it!! There's new artwork up, which I'll show you soon.

 Here's the view from the kitchen to the stairs. Figuring that the kitchen needed something festive, I put up a pre-made arrangement on the door with another red bow.

The garland is zip-tied to the stairs, haha :)


Oh- and can't forget, here's the quick outside shot:


How's your Christmas decorating coming along?
post signature

LinkWithin

Related Posts Plugin for WordPress, Blogger...