
I don’t know how Goodwill International works, but Goodwill of Central Indiana is one of the best GWs in the country. They have about 30+ stores, and they’re all very modern, clean, and even better – they don’t smell funny. :) I was privileged enough to learn about how they all work through my interactions with some of their corporate office people while taking on the duties of my 9-5 job.
Have you ever wondered how Goodwills don’t just pile up with tons and tons of donated stuff?
Three ways. On the first Saturday of every month, EVERYTHING in the store is 50% off. I always seem to stumble in on these days, and it is a mad-house. There are lines almost to the back of the store! Yesterday, I went into my nearby store around 1pm, and back at 8pm (I had to go back for something I wanted!). By the time 8pm rolled around, well over 75% of the inventory I’d seen earlier was gone. The place had been pillaged. Surprisingly, Goodwill employees were still extremely friendly and upbeat at this time of evening.
Second, check your price tag. Because nothing is supposed to stick around for more than a month (usually), GW does a color of the week. Price tags are color-coded so that each week, a new color tag is placed on product. After 4 weeks, that particular color becomes the color of the week, and at least in Indiana, that means you score 50% off that item. Don’t try to wait it out… good stuff gets snatched up quickly!
And last, in Indiana/Indianapolis, Goodwill has two Goodwill Outlet stores. If you’ve seen the GW trucks out and about, they’re transporting all the things that didn’t get purchased at the stores to the Outlet. In the Outlet, giant boxes of pre-sorted items (clothing, shoes, electronics, wares, plastics, etc.) get emptied out into shallow blue carts, and workers take them out onto the retail floor. They’re out there for exactly 30 minutes, and after that 30 minutes, whatever is left gets thrown away, donated, sent to third-world countries overseas, and the like.
I can’t gloss over the “take them out onto the retail floor” sentence, though. It is a MADHOUSE. It is like the feeding FRENZY of barracudas when they smell fresh meat. Like so:

Don’t get me wrong – stuff at Goodwill Outlet is NOT junk. Sometimes, it’s just priced too high and doesn’t sell at the store, so you can get some awe-some things here. Since it’s sold by the pound, you’re going to get a smokin’ deal. I see professional pickers and antique dealers here all the time looking for gold in a blue bucket… (spot them – they always wear gloves and have a systematic way of searching). Oh, and there’s rules too! When the carts are being replaced, you are not allowed to cross over the yellow line to grab your goods until the last new cart is put in place. Yes, furniture and TVs are easy to come by here too. And they all come cheap.
If you’re in Indiana, there are three Goodwill Outlets in Indy (but some GW networks don’t have any). Go there when you have a chance and relish in the chaos.
New Finds
I scored some gooood deals on 50% off Saturday yesterday. I have ideas on makeovers or uses for *most* all of them, so stand by while I get to work. Here they are in their thrifty glory:


 So far, I’m making slow progress, but it’s progress either way!

Have you ever wondered how Goodwills don’t just pile up with tons and tons of donated stuff?
Three ways. On the first Saturday of every month, EVERYTHING in the store is 50% off. I always seem to stumble in on these days, and it is a mad-house. There are lines almost to the back of the store! Yesterday, I went into my nearby store around 1pm, and back at 8pm (I had to go back for something I wanted!). By the time 8pm rolled around, well over 75% of the inventory I’d seen earlier was gone. The place had been pillaged. Surprisingly, Goodwill employees were still extremely friendly and upbeat at this time of evening.
Second, check your price tag. Because nothing is supposed to stick around for more than a month (usually), GW does a color of the week. Price tags are color-coded so that each week, a new color tag is placed on product. After 4 weeks, that particular color becomes the color of the week, and at least in Indiana, that means you score 50% off that item. Don’t try to wait it out… good stuff gets snatched up quickly!
And last, in Indiana/Indianapolis, Goodwill has two Goodwill Outlet stores. If you’ve seen the GW trucks out and about, they’re transporting all the things that didn’t get purchased at the stores to the Outlet. In the Outlet, giant boxes of pre-sorted items (clothing, shoes, electronics, wares, plastics, etc.) get emptied out into shallow blue carts, and workers take them out onto the retail floor. They’re out there for exactly 30 minutes, and after that 30 minutes, whatever is left gets thrown away, donated, sent to third-world countries overseas, and the like.
I can’t gloss over the “take them out onto the retail floor” sentence, though. It is a MADHOUSE. It is like the feeding FRENZY of barracudas when they smell fresh meat. Like so:
Don’t get me wrong – stuff at Goodwill Outlet is NOT junk. Sometimes, it’s just priced too high and doesn’t sell at the store, so you can get some awe-some things here. Since it’s sold by the pound, you’re going to get a smokin’ deal. I see professional pickers and antique dealers here all the time looking for gold in a blue bucket… (spot them – they always wear gloves and have a systematic way of searching). Oh, and there’s rules too! When the carts are being replaced, you are not allowed to cross over the yellow line to grab your goods until the last new cart is put in place. Yes, furniture and TVs are easy to come by here too. And they all come cheap.
If you’re in Indiana, there are three Goodwill Outlets in Indy (but some GW networks don’t have any). Go there when you have a chance and relish in the chaos.
New Finds
I scored some gooood deals on 50% off Saturday yesterday. I have ideas on makeovers or uses for *most* all of them, so stand by while I get to work. Here they are in their thrifty glory:


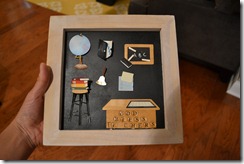
Here’s my first quick makeover of a $1 “God Bless Teachers” scrapbook project turned ugly:

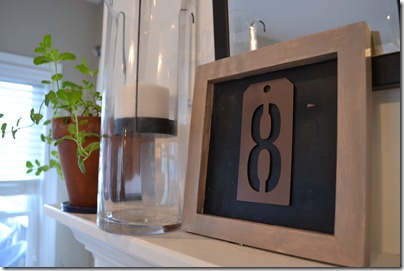
…with a little paint, a hot glue gun, and a $1 metal stencil tag from Michael’s.
Total cost: $3.

More before and afters coming up tomorrow!
Ps - I was just at Kohl's yesterday, and speaking of good finds, this driftwood mirror is on super-clearance for $50, from $130! The Bloomington store had 2 in stock, but it's no longer available online.


