Showing posts with label artwork. Show all posts

Friday, March 1, 2013

Free Printable - Latitude Artwork

In keeping with my make-it-short-and-sweet mentality of blog posting, I wanted to share another recent artwork update in the house. Today you're looking at the newest artwork change in the guest bathroom upstairs.


Previously, I put a bird on it. The bright magenta bird packed too big of a punch, and I made the executive decision to take this bathroom to a more put-together and clean color palette. Enter grey and yellow.
The bathroom is also rocking this West Elm bath mat in navy blue, plus these fun Nate Berkus towels. Together, they give this space what I'll call a modern-nautical vibe:
Fez Bath Mat, 23Nate Berkus™ Ikat Link Bath Towel
I decided to make a little bit of artwork. I did it in Photoshop, and got the background of my print to echo the herringbone design of the bath mat. A little tonal grey-on-grey never hurt anyone. :)


I'll switch out the strong black frame for a wood one next to continue with the nautical theme.
Up close -- can you see the herringbone? Love.


But wait, I made a version so you can make your own personal one (easily) too!


First a shameless plug: if you use this artwork or like what you see, please Follow Me!

Now. Get yours:
1) Download the Microsoft Word doc here. (Click the link or Right-click and select "Save As")
2) Figure out your home's latitude coordinates. I used this site.
3) Edit the Word document to reflect yours (you can change fonts and colors, too!).

** Image size will print approximately 8"x10"**


These coordinates, with my longitude, put us somewhere near Huntsville, Alabama. If this is your house's location.... double-score.

Voila! Easy, personal, DIY artwork and you didn't break a sweat.

Thanks for stopping by! If you're a fan of free printables, I have some other popular ones you might want to check out here and here.

post signature

Linked up at:
Liz Marie Blog
Too Much Time On My Hands Style By Stephanie Lynn

Wednesday, February 27, 2013

Gallery Wall Update - Third Edition

Why, hello friends! How have you been?

I'm still here. Here, but busy! Since I posted last, I finished my first 50-mile trail ultra marathon! (I'm proud. Firsts are awesome. It was really fun!) Also, we're getting a puppy next weekend -- he's a mini goldendoodle.

By the way, I made two new year's resolutions this year:

1) Shorter, but more frequent blog posts. I'm slowly realizing that each post doesn't have to be a dissertation. I've been posting about our personal, travel, and running adventures on bartleysrun.com. Go see! I do lots of little projects that don't necessarily need a ton of explanation, but are worth sharing, so I will shoot for more photos and less chatter!

2) Change out of my pajamas at least daily. As a remote worker in my 8-to-5 job, my uniform had started to become yoga pants and t-shirts. Or running clothes that I never showered and changed out of after an early-morning run. Don't judge! I've started following some "everyday fashion" blogs and will try to document some of my favorite outfits from time to time, just for fun.

Ah, but don't think nothing's changed around the house! You are about to see the new and improved gallery wall!!


This gallery wall has been through a lot. It's always been DIY, but I'm finding that I'm polishing and filling these frames with images I love and - most importantly - can live with for months. Remember the first go-around? I started with some close-ups of flowers in the neighborhood. Then, the second time, I blew up and printed out a bokeh image of downtown. But it just wasn't right... the colors, the lack of texture, the size of the prints -- all challenges.

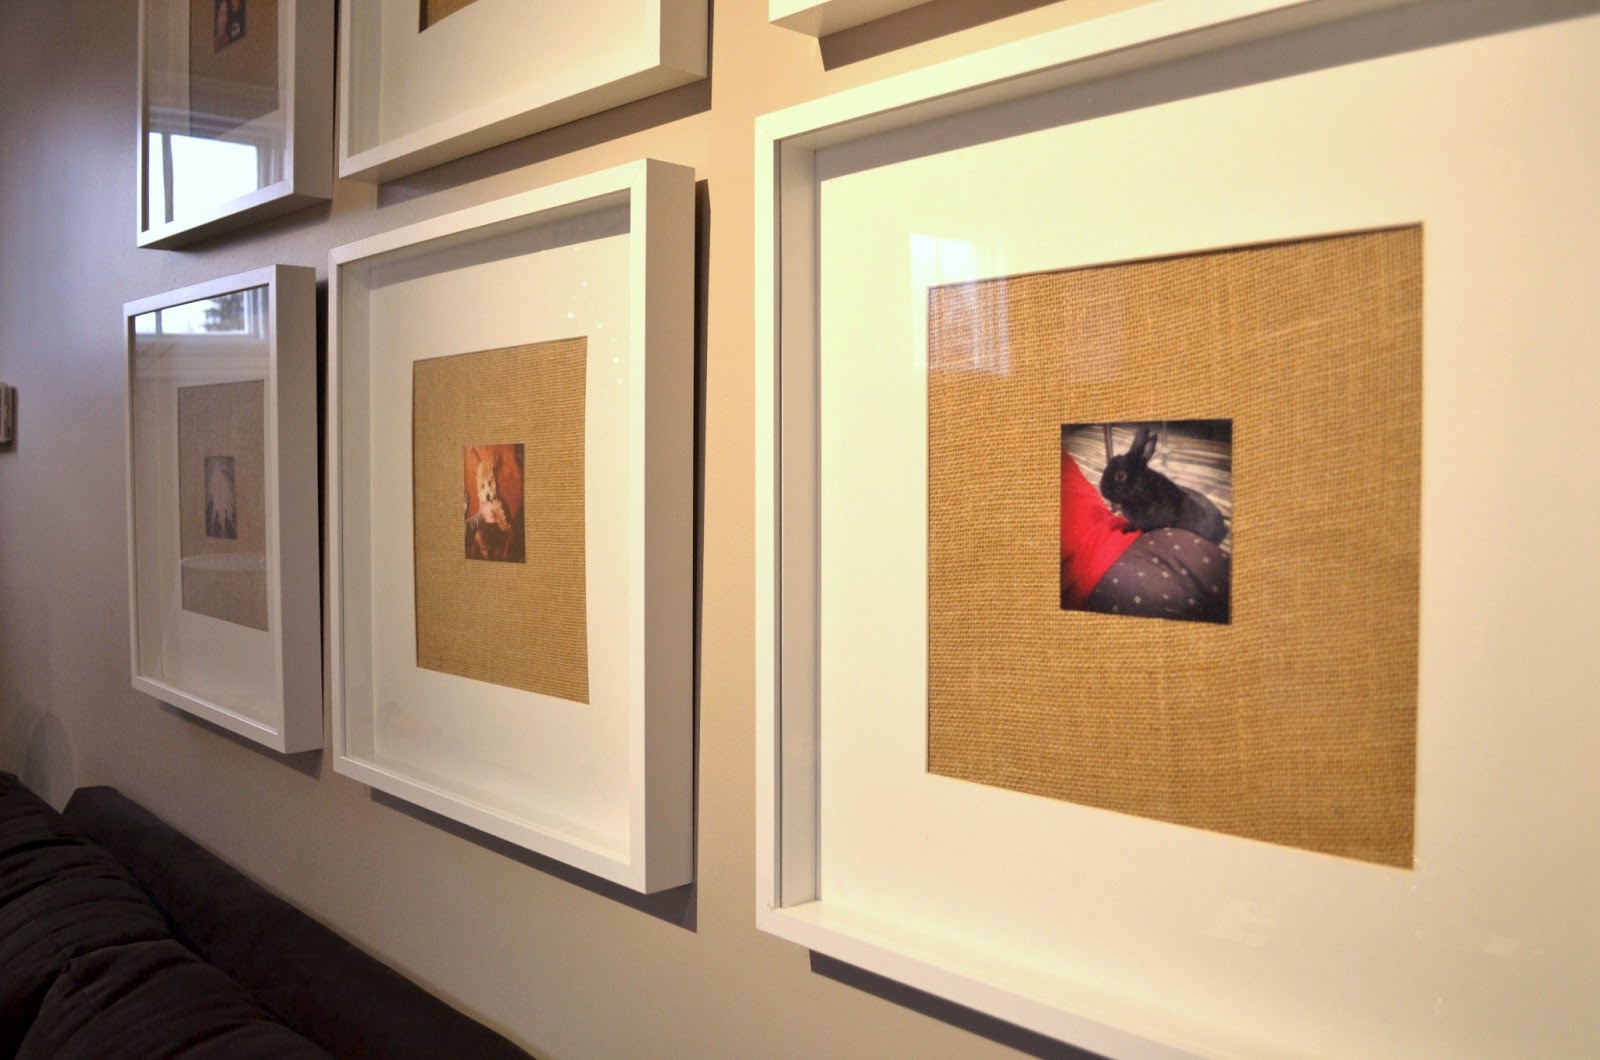
I bought some burlap fabric and spray adhesive from Hobby Lobby, glued the fabric to the back of the frame backing, and then spray-adhesived some of my favorite instagram photos right on top of the burlap. Ta-da!


This (above) was the first try. Yikes. I had bought the fabric months earlier and finally got around to this project, but by that time the fabric was really wrinkled. I ironed it (which actually melted and strengthened the spray-adhesive bond) and it straightened right up! Her's the after, a close-up of a few more shots... just for fun.

Todd the Bunny:

Me, Ben, and our friend Tom in Utah last Summer:


A little zoomed out...

Sorry for the glare!

This is a seriously hard room to photograph! I'd love to learn how to use this schmancy camera...

Shadows - running with friends in Boulder, CO.


Ted Jones, the mini goldendoodle.


Texture! Flexibility with the smaller size of artwork! Subtle, but personal art! I'm in love with my gallery wall again. If history's taught us anything, there will be plenty more iterations of the gallery wall to come if when I get antsy.

Ps- I'm working on something new and big... furniture, and finishing out the ever-challenging Fireplace Room-- so many ideas, and so little time!

post signature

Tuesday, January 31, 2012

Gallery Wall Update

The most awesome part about cheap gallery wall art is that I can change it at any time without breaking the bank. The Spring flower theme wasn't cutting it for the Winter months... and since I put them in the frames, I've never felt like they fit in the room.

Here's my latest gallery wall update:

The picture is actually a night shot of downtown Bloomington, IN on the town square in front of the historic courthouse. I was standing in front of our family store and looking down the street. In focus, the area looks more like this, below. It's beautiful when it's all lit up for the Winter season.


Photo: Jeff Hammon - Flickr 

The photo effect is so pretty! It's seriously fueled my desire to buy a big-girl camera and quit using my ol' digital one that's ages old... only a SLR (or someone with serious patience in Photoshop) can create this blurry-lighting effect, called bokeh.

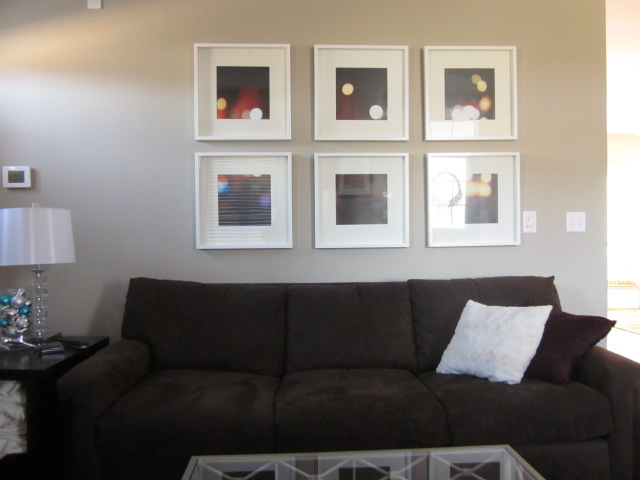
If you squint, you might be able to tell that the little red dots on the bottom left are a car's brake lights. I took the original picture and split it up into six panels in Photoshop and sized them to 11.5" squares. Then, I took the photos over to my favorite Kinko's and had them print each page out on 12"x18" paper for $1.79 a piece. You can't beat that!


*I would recommend, however, if you take on this project, to lighten up your photos before you bring them to print. Or, make sure they lighten them in the store. The panels turned out a little too dark for me. It was too late by the time I realized it. It's still good. :)

And once again, this artwork has special significance to me and Ben -- this is our town!

And, here's how it fits into the rest of (that side of) the room. It was insanely bright on the day I photographed it, so excuse the glare. Let's call that more reason to get a fancypants camera, eh?


So, there you have it - new photos and new artwork. How easy was that?


post signature

Thursday, December 1, 2011

Mood Board: Rug Rambling

Time for another mood board!

I went shopping on Black Friday and Cyber Monday, getting some good deals on home decor items. Most notably, the Tilda Rug was on clearance at Crate & Barrel, plus they were running a coupon code for 15% off of your entire purchase - including sale items. Now, I've been patient... I have watched that rug for months, hoping it'd go on sale. Finally, it did! I deliberated forever and polled everyone I knew to determine whether the current 5'x8' rug was too small for this sad, sad space:

Current rug... too small?

Same rug, centered in the room
...Please excuse the clutter. One problem at a time! :)


Survey results: that rug is too small. Some people thought it was an appropriate size. Do you agree?


There are tons of "rules" written about rug size and placement of furniture, and the ones most people refer back to are: a) all legs of furniture on the rug or b) front legs of all furniture on the rug. The 5'x8' size was $199 - 15%. That's over $300 less than the 8'x10' size! At that point, this rug was becoming an investment. I really wanted the 5'x8' size to work, and layering it with a larger jute rug or something less expensive was even less expensive than diving head-first into the larger single rug. If I know myself at all, I'd end up spending that $300 anyway - somehow - on some other solution I end up liking much less. So, I pulled the trigger just minutes before midnight on Cyber Monday.
Lesson learned: If you're going to buy a rug, get one that's the right size, good quality, and a design you like. You're going to be looking at it for a long time!
[Photos: Crate & Barrel]
A close-up. Subtle but colorful!

Hopefully you've noticed another new addition to the front room - the coffee table! It's the Levinson Coffee Table from Pier1, which is on clearance right now for $89 down from $199. I've been lusting over metal and glass tables, since I knew the DIY ottoman (in the earlier photo) was cool, but too much dark fabric for that space. 89 bucks for a iron and glass table? Yes! I reserved it online at Pier1 ToGo (their online way of calling dibs on products for pick-up in store), I dragged Ben up to Greenwood to go get the table, and once the associates found it, they realized there was a small scratch in the paint. The scratch was the size of my fingernail, and barely noticeable! So, they took another 10% off of the clearance price for me. That totals $81 for this $200 table. Woot!
[Photo: Pier1] We left the bottom glass layer
off so Todd the bunny can sit under the table.
If you've been following along, I've been forever trying to come up with a good solution to work around that brown sofa, too. Besides that, that imposing 48" tv that has to stay here until we finish the basement. Lots of challenges, but I think I'm finally getting somewhere.

So on with the mood board already! Here is the plan in motion, with plenty of pillow options:

Although the final result won't look exactly like this, it'll be close. I'm excited about this room for the first time ever. Build the room around the rug. I get it now!

Breaking it down:

  • Table lamp - Posh Tots, Small Uma Crystal Table Lamp - $144 (Similar one for $40 at HomeGoods)
  • Side table - Oka, Low Table in Ebony/Brown - $185 (Mine is similar, from Value City Furniture)
  • Gallery frames - Ribba Frames from Ikea - $29 each
  • Artwork - Crate & Barrel, Focus Print I and II - $149 each. I'm DIY-ing artwork in this abstract style, called bokeh. If you have Photoshop or an SLR camera, you can too!
  • Area Rug - Crate & Barrel, 8'x10' Tilda Rug - $499 (on sale!)
  • Accent Chairs - Craigslist find, $25 each. I'll reupholster them in a linen-like fabric.
  • Pillows - blue from Inhabit - 1929 in Cornflower, $45; grey from 2Modern - Bholu, $99; green trellis from Layla Grace, Geo Print Green Pillow Pair - $118; yellow top from All Modern - Inhabit Cattails throw pillow - $60; orange from PoshTots, Cintron Scaled Pillow - $70; coral from Layla Grayce, Company C Pillow - $145.
  • Basket - Oka, Rattan Basket - $59 
What do you think - you like?

post signature


Linking Up at:

Tuesday, August 23, 2011

Pinterest-Inspired Gallery Wall

Pinterest is never-ending source of inspiration. Just about every day, I find something new that I want to DIY, just like this:


Or this reclaimed wood bench:


Or this scrabble letter art, which is totally "us":


Images via Pinterest

Actually, I have a DIY To-Do Pinterest board now and it grows by the day! I've been searching high and low for some kind of art to put behind the sofa in our living room - something that I won't get sick of in a week. If you'll recall, the living space is pretty sad-looking; it's the room we spend most of our time in, yet is the most disjointed and mismatched. Need a refresher?
Yikes. Needs work!
A few months ago I spotted this a-mazing gallery wall, while I was searching for a gallery wall layout that I eventually used in our dining area. Here is the gorgeous Ikea Ribba white frame gallery, from Parlour Home blog, filled with floral images by Cassia Beck, which you can purchase online in her Etsy shop. Check it out:


I am drooling over that painted brick wall, the symmetry, and heck - I even want that cat! There was a stretch of a few weeks where I was near an Ikea multiple times (because it's otherwise a 2.5+ hour drive away to reach Chicago or Cincinnati), so I picked up white frames to my heart's content. For $20 a pop and a 16" x 16" frame, you really can't beat that!

The Instagram-like effect using the flowers make the art seem traditional, yet the colors appear more modern.   In the meanwhile, I've been learning lots about Photoshop, and my new skills helped me to visualize my grey and yellow bedroom here. I thought I'd take a couple of amateur photos and see what I could do in Photoshop to mock the Instagram effect -- c'mon, we're not all iPhone users! ;) The funniest part is that most of these flowers are weeds that are growing in the empty lot across the street!

Here a couple of the prints I made in Photoshop with the help of some free Photoshop Actions I downloaded:


I saved them as gigantic image files and took them to Kinko's. The mat size makes the picture 11.5" x 11.5" and, just my luck, they actually have a paper size that is 12" x 18" -- printed in color, for $1.79 a page. Any larger, and it'd get printed out on the plotter, which would run me $7-$8 per page... yikes!

For a couple of hours, and $21.79 per frame, here's my completed frame gallery:


Some new pillows and a coffee table should help get this living room to a better place. I'm already playing with the idea of adding yellows and purples, since these images are so easy to switch out. What about you? Have you ever made anything you saw on Pinterest?

post signature

LinkWithin

Related Posts Plugin for WordPress, Blogger...